

How to Install Vinyl Siding
Vinyl siding can give a home a clean, updated exterior while providing a practical alternative to more maintenance-intensive siding materials. But how to install vinyl siding correctly involves more than attaching panels to an exterior wall. Proper preparation, accessories, measurements, fastening, and finishing all affect the final result.
For homeowners, understanding the installation process can help you know what to expect when hiring a professional. It can also help you recognize why preparation and careful installation matter.
This guide explains the main stages of vinyl siding installation in straightforward terms. It is not intended to replace professional installation instructions or manufacturer requirements. Instead, it provides a homeowner-friendly overview of how a typical project comes together and why experienced installation can make a difference.
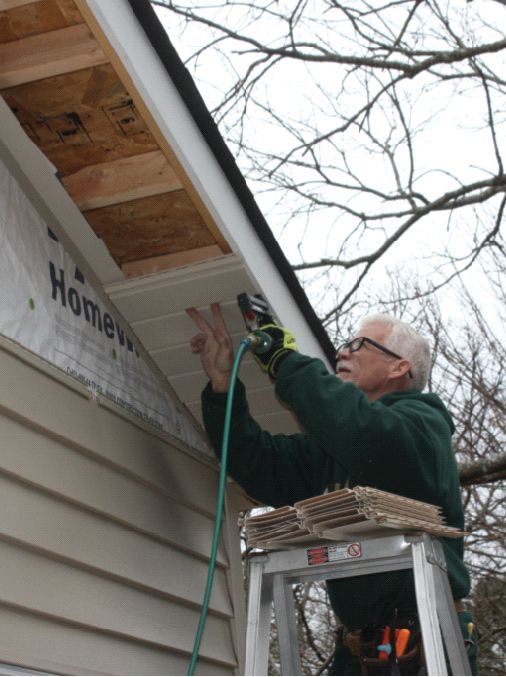
How Vinyl Siding Installation Works
A vinyl siding project generally involves preparing the exterior, installing the components that support the siding system, fitting panels around windows and doors, and finishing the edges and trim.
The process can vary depending on the home’s construction, existing siding, product selected, and manufacturer requirements. However, the basic stages often include:
- Inspecting and preparing the exterior
- Installing the appropriate weather protection and accessories
- Installing the starter components
- Planning around windows and doors
- Installing the siding panels
- Allowing for expansion and movement
- Completing trim and finishing details
The goal is not simply to cover the exterior wall. The siding system needs to be installed so that the panels can function properly while creating a consistent finished appearance.
Professional installers also need to account for architectural features, corners, openings, and transitions throughout the home.
Inspect and Prepare the Exterior
Good installation starts with the surface underneath the siding. Before new vinyl siding is installed, the exterior should be assessed to identify conditions that could affect the project.
If existing siding is being replaced, the condition of the wall beneath it may not be fully visible until the old material is removed. Damaged or unsuitable areas may need attention before the new siding can be installed.
What Should Be Checked?
The preparation stage may involve considering:
- The condition of the exterior wall
- Existing siding and whether it needs removal
- Areas around windows and doors
- Corners and transitions
- Moisture-related concerns
- The condition of existing trim
- The appropriate weather-resistant barrier
A weather-resistant barrier can form an important part of the exterior wall system. The exact materials and installation requirements depend on the home’s construction and the siding manufacturer’s instructions.
This stage is one reason homeowners should avoid viewing siding installation as a simple weekend project. Problems underneath the old siding need to be identified before they are covered by the new material.
Install Required Accessories and Starter Components
Once the exterior is appropriately prepared, the installation can move to the components that help establish the siding system.
A starter strip is installed near the bottom of the siding area. It provides the starting point for the first course of siding panels and helps establish the correct position for the panels above it.
Other accessories can include corner posts and channels used around openings and edges.
Why Starter Components Matter
The first row of siding influences the alignment of the rows above it. If the starting point is not established correctly, small errors can become more noticeable as the installation progresses.
The starter strip therefore needs to be positioned carefully and according to the product requirements.
Corner posts are also important because they provide a finished transition where two exterior walls meet. These components need to be aligned with the rest of the installation.
A professional installer will use the manufacturer’s installation requirements rather than relying on a generic method for every product.
Plan Around Windows and Doors
Windows and doors create some of the most detailed areas of a siding project. The siding needs to transition neatly around these openings while allowing the existing features to function properly.
J-channel is commonly used around certain siding edges and openings. Trim components can also be used to create clean transitions around windows, doors, and other areas.
Why These Areas Require Attention
A window opening may involve several layers and materials. The siding needs to work with the existing window, surrounding trim, and weather protection.
The same applies to exterior doors. Poor planning around an opening can result in uneven cuts, unattractive transitions, or problems with the finished installation.
This is also why homeowners considering window or door replacement should discuss those projects with their siding contractor before installation begins.
If a window or door is going to be replaced soon, coordinating the work can sometimes make more sense than completing the siding first and modifying it later.
Install Vinyl Siding Panels
After the supporting components are in place, the siding panels can be installed.
Panels are generally installed in courses, with each row connecting to the one below it. The installer works across the exterior while checking alignment and fitting the panels around corners and openings.
The process may look straightforward, but careful measurement and positioning are important. Each panel needs to be appropriately fitted without creating unnecessary stress on the material.
Why Alignment Matters
A siding installation can cover a large portion of the home’s exterior. Even small alignment problems may become obvious when viewed across an entire wall.
Installers therefore need to monitor the position of the panels as the work progresses. Corners, windows, doors, rooflines, and other architectural features can make this more challenging.
The installation should also follow the specific requirements of the siding product being used.
Allow for Material Movement
One of the most important concepts in vinyl siding installation is that the material needs room to move.
Vinyl can expand and contract as temperatures change. If panels are installed too tightly or fasteners are used incorrectly, the siding may not have enough freedom to move naturally.
Why Expansion Matters
Proper installation allows for expansion and contraction without placing unnecessary stress on the panels.
Fasteners should secure the siding while still allowing the panels to move as intended. The exact requirements depend on the siding product and manufacturer’s instructions.
This is one area where professional installation can be particularly valuable. A visually neat installation is not enough if the panels have been fastened in a way that prevents normal movement.
Homeowners should not assume that tighter always means better. With vinyl siding, appropriate movement is part of the installation system.
Finish Around Trim and Openings
Once the main siding panels are installed, attention turns to the edges and transitions.
This can include areas around:
- Windows
- Exterior doors
- Corners
- Soffits
- Fascia
- Rooflines
- Other exterior openings
Trim helps create a finished appearance and provides transitions between the siding and other parts of the home’s exterior.
The exact components used depend on the home’s design and the siding system.
Finishing Requires Precision
The final details can have a major impact on the overall appearance of the project. Uneven cuts, poorly aligned trim, or inconsistent transitions can stand out even when most of the siding installation looks good.
Professional installers also need to work around existing architectural features without compromising the siding system.
This is why the finishing stage should not be treated as an afterthought.
Common Vinyl Siding Installation Mistakes
Understanding common mistakes can help homeowners recognize why professional installation matters.
Installing Over an Unprepared Surface
Covering damaged or unsuitable exterior surfaces without addressing them first can create problems later. Preparation should be completed before new siding conceals the underlying area.
Incorrect Fastening
Overdriving fasteners or securing panels too tightly can restrict the movement vinyl siding needs.
Ignoring Expansion
Vinyl siding needs room to expand and contract. Failing to account for material movement can affect the appearance and performance of the installation.
Poor Alignment
If the first course is not positioned correctly, alignment problems can continue across the exterior.
Improper Cutting Around Openings
Windows and doors require careful measurements and finishing. Poor cuts can make the completed project look uneven.
Skipping Manufacturer Requirements
Different siding products may have specific installation requirements. A generic approach may not be appropriate for every product.
For these reasons, homeowners should follow the manufacturer’s instructions or have the installation completed by a qualified professional.
DIY vs Professional Vinyl Siding Installation
Some homeowners may consider installing siding themselves to reduce project costs. While basic installation concepts may seem manageable, a complete siding project involves more decisions than simply attaching panels.
DIY installation requires the homeowner to understand surface preparation, weather protection, measurements, starter components, trim, fastening, expansion, and detailed work around openings.
There is also the question of time. Installing siding on an entire home can involve significant preparation and repeated work across large exterior surfaces.
When DIY May Become Difficult
A project becomes more challenging when the home has:
- Multiple levels
- Complex architectural features
- Numerous windows and doors
- Damaged underlying surfaces
- Existing siding that requires removal
- Difficult exterior access
- Extensive trim requirements
Mistakes may also be expensive to correct after materials have been installed.
For homeowners without experience, professional installation can provide a more straightforward path to a finished result.
When to Call a Professional
If you are unsure about the condition of your exterior wall, have extensive siding damage, or simply do not want to manage a large installation yourself, consider contacting a professional siding contractor.
A professional can evaluate the project, identify preparation requirements, discuss suitable siding options, and explain what the installation involves.
An experienced installer can also handle the detailed areas around windows, doors, corners, trim, soffits, and fascia.
Most importantly, professional installation can help reduce the risk of mistakes involving alignment, fastening, expansion, and weather protection.
Before hiring a contractor, ask about their experience, the scope of work, materials, preparation, and what is included in the estimate.
Vinyl Siding Installation in Florence, SC
Knowing how to install vinyl siding gives homeowners a better understanding of what happens during an exterior renovation. The process starts with preparation and continues through accessories, starter components, siding panels, expansion considerations, and detailed finishing.
However, understanding the process is different from carrying out a complete installation. Siding needs to work as part of the home’s exterior system, and small mistakes can affect the finished appearance or performance.
Pee Dee Window and Door Solutions has served local homeowners since 1993 and brings more than 30 years of hands-on experience to home improvement projects. We specialize in vinyl siding, vinyl window replacement, and door installation.
If you are considering new siding for your home in Florence, SC, you do not have to manage the installation yourself.
Want the siding installed professionally? Request an estimate from Pee Dee Window and Door Solutions.