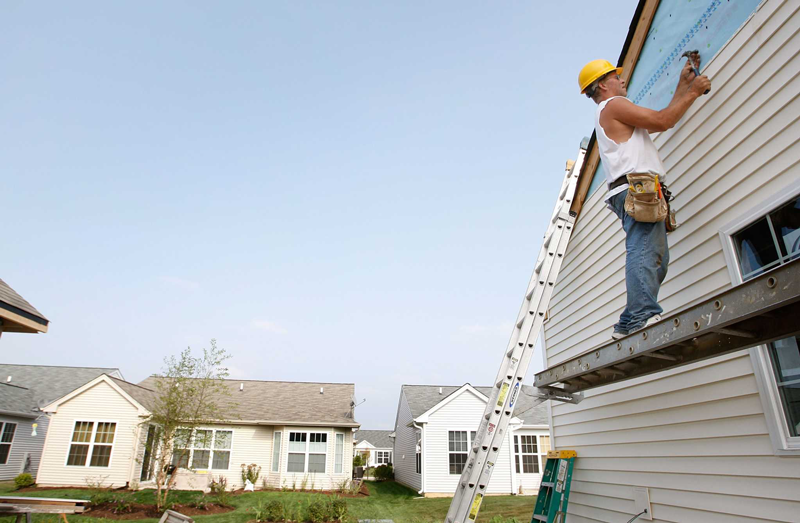
How to Measure an Exterior Door for Replacement

How to Measure an Exterior Door for Replacement

Replacing an exterior door starts with getting the measurements right. If a new door does not match the existing opening, how to measure an exterior door for replacement becomes an important question before ordering a new unit.

A few basic measurements can help homeowners understand their existing door and prepare for a replacement project. However, measuring an exterior door is more than checking its width and height. The frame, jamb, threshold, opening, swing, and condition of the existing installation can all affect which replacement option is appropriate.

This guide explains the main measurements homeowners can take as a preliminary reference. It also explains why final product ordering should be based on accurate, project-specific measurements from a professional installer.
What Measurements Do You Need for a Replacement Door?

Before replacing an exterior door, you may need to record several dimensions and details about the existing installation.

The most useful information can include:

  • Door width
  • Door height
  • Door thickness
  • Frame dimensions
  • Jamb depth
  • Rough opening
  • Door swing and handing
  • Hinge location
  • Threshold condition
  • Frame condition

The exact measurements needed can depend on whether you are replacing only the door slab or the complete door and frame assembly.

A slab replacement and a prehung door are not the same project. A prehung unit includes the door mounted within a frame, while a slab is the door itself.

Because exterior door openings can vary, homeowners should treat their initial measurements as a guide rather than using them as the sole basis for ordering a new door.

Measure the Existing Door Width

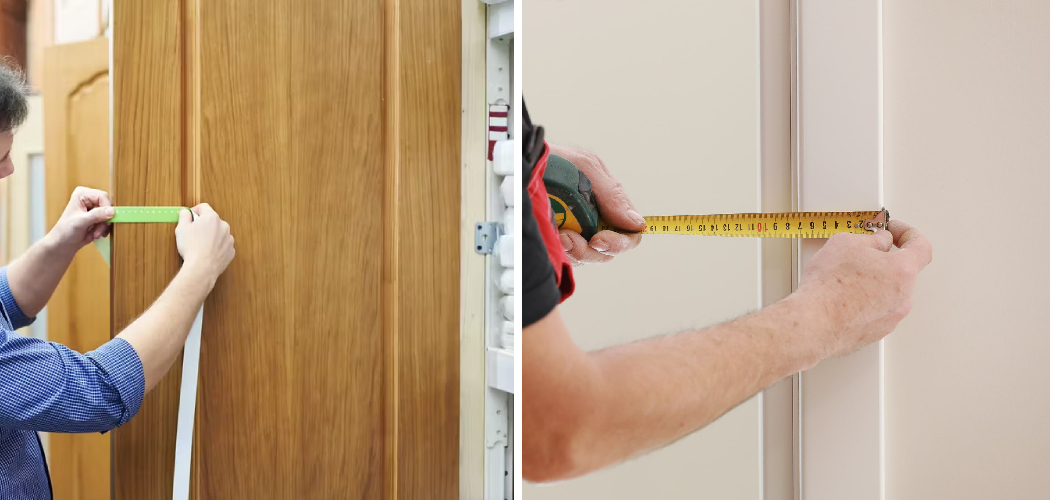
Start by measuring the width of the existing exterior door.

Use a tape measure to measure from one side of the door to the other. Take the measurement across the door itself rather than measuring the surrounding trim.

It can be helpful to take measurements at more than one point, such as near the top, middle, and bottom.

Why Take Multiple Measurements?

Older doors and openings are not always perfectly uniform. Small variations can occur because of age, construction, movement, or previous modifications.

Recording multiple measurements can help identify these differences.

Write down the measurements clearly and note whether you are measuring the actual door slab or the opening.

This distinction matters because a replacement door is not necessarily ordered using the same dimensions as the visible door slab.

Measure the Door Height

Next, measure the height of the existing door.

Measure from the top edge of the door to the bottom edge. As with the width, taking measurements at more than one point can help identify differences.

Make sure the tape measure is positioned accurately and that you are measuring the actual door rather than the decorative trim surrounding it.

Record Your Measurements Carefully

If you are measuring several doors, label each measurement according to its location. For example, you might record “front entry” or “rear exterior door.”

This prevents confusion if multiple doors are being considered for replacement.

Remember that the door height alone does not determine the final replacement size. The frame and opening also need to be evaluated.

Measure Door Thickness

Door thickness is another useful measurement.

Place the tape measure across the edge of the door to determine how thick the existing door slab is.

This measurement can help when considering replacement hardware and compatibility.

Different doors may have different thicknesses, and the appropriate hardware may depend on the door construction.

If you are planning to replace only the slab and keep the existing frame, accurate information about the existing door becomes particularly important.

Measure the Door Frame

The door frame surrounds the door and provides the structure in which it operates.

When measuring the frame, consider the width and height of the area in which the door sits. Do not rely only on the visible exterior trim.

Look Beyond the Trim

Exterior trim can make the opening appear larger than the actual frame. Measuring only the outer decorative casing may therefore produce an inaccurate result.

If you are planning a complete prehung replacement, the dimensions of the existing frame and opening become especially important.

The frame should also be inspected for signs of damage, warping, or deterioration. Measurements alone cannot tell you whether the existing frame is suitable for reuse.

Check the Jamb Depth

The jamb is the vertical and horizontal structure that forms the inside portion of the door frame.

Jamb depth is important because it relates to the thickness of the wall assembly and how the door frame fits within the opening.

To get a preliminary measurement, measure from the interior edge of the jamb toward the exterior edge.

Why Jamb Depth Matters

A replacement door needs to work with the surrounding wall and frame configuration. If the jamb depth is significantly different from what the replacement system requires, additional work may be necessary.

This is another measurement that should be confirmed by a professional before a replacement unit is ordered.

Understand the Rough Opening

The rough opening is the structural opening in the wall into which a door assembly is installed.

For homeowners, this can be harder to measure accurately when the existing door and frame are still installed.

You may be able to estimate the opening by measuring around the existing frame, but this does not always provide the exact structural dimensions needed for ordering.

Why Rough Opening Measurements Matter

A replacement door needs to fit within the available space while allowing for appropriate installation, adjustment, and sealing.

An opening that is slightly different from what you expect can affect the size and type of replacement door required.

For this reason, rough opening measurements should generally be confirmed as part of a professional site assessment.

Check Door Swing and Handing

Dimensions are only part of the information needed for a replacement door.

You should also determine how the door opens and which side the hinges are located on. This is often referred to as door handing.

Stand on the appropriate side of the door and observe which way it swings. Note whether the hinges are on the left or right and whether the door opens inward or outward.

Why Handing Matters

Ordering a door with the wrong handing can create significant problems.

The door needs to operate correctly within the home’s entryway, and its hardware, hinges, and frame configuration must work together.

If you are uncertain about your door’s handing, ask a professional to confirm it rather than guessing when ordering a replacement.

Check the Threshold and Frame Condition

While measuring, take a few minutes to inspect the bottom of the door and surrounding frame.

The threshold is located at the bottom of the doorway and forms part of the transition between the interior and exterior.

Look for visible signs of:

  • Moisture damage
  • Rot or deterioration
  • Cracks
  • Warping
  • Loose components
  • Gaps around the frame
  • Difficult door operation

These conditions can affect the scope of a replacement project.

Why Condition Matters as Much as Measurements

A door may appear to be a simple replacement until the existing frame is inspected.

If the frame or surrounding materials are damaged, installing a new door without addressing the underlying problem may not be the best solution.

This is why a professional evaluation is important before finalizing your replacement order.

Common Door Measuring Mistakes

Homeowners can avoid several common mistakes by taking a careful approach.

Measuring Only the Door Slab

The slab dimensions do not necessarily tell you the exact size needed for a replacement assembly.

Measuring the Exterior Trim

Decorative trim can make the opening appear larger than it actually is.

Taking Only One Measurement

Openings can vary slightly from top to bottom or side to side. Multiple measurements provide more useful information.

Forgetting Door Handing

A replacement door with the wrong swing or hinge configuration may not operate correctly.

Ignoring the Frame

A damaged or unsuitable frame can change the scope of the project.

Ordering From Preliminary Measurements Alone

Homeowner measurements can be useful for planning, but final ordering should use accurate, project-specific measurements confirmed for the actual installation.

Why Final Professional Measurements Matter

If you are researching how to measure an exterior door for replacement, taking preliminary measurements can help you understand your current door. However, these measurements should not necessarily be used as the final specifications for ordering a replacement.

A professional installer can evaluate the entire door system, including the slab, frame, jamb, threshold, rough opening, handing, and surrounding materials.

They can also identify conditions that may not be obvious to a homeowner.

Professional Assessment Can Prevent Costly Errors

Ordering the wrong door size can result in delays, additional work, or the need to reorder materials.

A professional measurement also provides an opportunity to discuss whether you need a slab replacement or a complete prehung door.

This is particularly important for older homes, unusual openings, damaged frames, or projects involving significant exterior changes.

Taking your own measurements is useful for planning. Final measurements should be treated as an installation-specific task.

Need Door Replacement in Florence, SC?

Knowing how to measure an exterior door for replacement can help you prepare for a conversation with a door professional. Measure the existing door’s width, height, and thickness, inspect the frame and threshold, check jamb depth, and make a note of the door swing and handing.

However, measurements are only one part of choosing the right replacement. The condition of the existing opening and the installation requirements also need to be considered.

Pee Dee Window and Door Solutions has served local homeowners since 1993, bringing more than 30 years of hands-on experience to home improvement projects. The company specializes in door installation, vinyl window replacement, and vinyl siding.

If your front or exterior door is damaged, difficult to operate, drafty, or outdated, a professional assessment can help you determine the right replacement approach.

Need door replacement in Florence? Request an estimate from Pee Dee Window and Door Solutions.
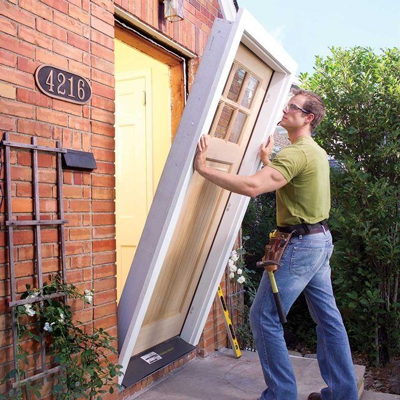
How Much Does Door Replacement Cost?

How Much Does Door Replacement Cost?

Replacing an exterior door can change more than the appearance of your home. A new door can address problems such as drafts, difficult operation, worn frames, moisture damage, or an outdated entryway. But before starting a project, many homeowners want to know one thing:

how much does a door replacement cost?

There is no single price that applies to every door replacement project. The total cost depends on the type of door, material, size, frame condition, hardware, glass features, installation requirements, and other project-specific factors.

If you are considering a replacement door for your Florence, SC home, understanding these factors can help you plan your budget and compare estimates more effectively. This guide explains the major elements that can affect door replacement costs without relying on made-up or generic pricing from a local contractor.

What Affects Door Replacement Cost?

The cost of a replacement door depends on more than the door itself. A complete replacement project can involve the existing door, frame, hardware, installation, finishing, and disposal of the old unit.

Some of the main factors include:

  • Door type and size
  • Door material
  • Slab or prehung construction
  • Condition of the existing frame
  • Hardware and locks
  • Glass and sidelights
  • Installation labor
  • Removal of the old door
  • Disposal
  • Exterior and interior finishing

Understanding these factors can help you determine why two seemingly similar door projects may have different estimates.

Door Type

The type of exterior door you choose is one of the first factors that can affect the overall project cost.

A basic exterior entry door may have different requirements from a larger decorative front door or a door with glass panels and sidelights.

Homeowners should consider how the door will be used and what they want it to accomplish.

For example, a front entry door may be selected primarily for appearance, while a side or rear exterior door may place greater emphasis on durability and practical operation.

The size and configuration of the opening can also influence the project. A standard replacement may be more straightforward than an opening requiring significant modification.

When requesting an estimate, explain where the door will be installed and what you want from the replacement.

Door Material

The material selected for a door can influence both the initial cost and the characteristics of the finished product.

Different exterior doors can be made from materials with different appearances, maintenance requirements, durability characteristics, and price points.

When comparing options, consider more than the initial purchase price. Think about how the door fits your home’s exterior, how much maintenance you are comfortable with, and what type of performance you expect.

A professional can explain the available options and help you compare them based on your home’s needs.

Why Material Choice Matters

Your front door is exposed to changing weather conditions and regular use. The material needs to be appropriate for the location and intended application.

A homeowner replacing a frequently used entry door may have different priorities from someone replacing a less frequently used exterior door.

The right material therefore depends on the specific project rather than a universal “best” choice.

Slab Door vs Prehung Door

Another important consideration is whether you need a slab door or a prehung door.

A slab door is essentially the door itself without the complete frame assembly. If the existing frame is in good condition and is suitable for the replacement, a slab replacement may sometimes be an option.

A prehung door comes with the door already mounted within a frame. This can make sense when the existing frame is damaged, outdated, or being replaced as part of the project.

Which Option Is Right for Your Home?

The condition of the existing frame is an important consideration.

If the existing frame is sound and properly suited to the new door, replacing only the slab may be possible depending on the project. If the frame is damaged or deteriorated, replacing the complete assembly may be more appropriate.

A professional assessment can help determine which approach makes sense for your home.

Door Frame Condition

The frame plays an important role in the performance and appearance of an exterior door.

A frame that is damaged, warped, deteriorated, or affected by moisture may need to be repaired or replaced rather than simply installing a new door into the existing structure.

The jamb and threshold should also be considered. These components need to work correctly with the new door and opening.

Why the Existing Frame Can Change the Estimate

A straightforward door replacement may involve removing the old unit and installing a new one. But if the surrounding structure needs repairs, the scope of work can become more extensive.

This is why online cost calculators cannot provide an accurate price for every home. The condition of the actual opening needs to be considered.

During an estimate, ask whether the existing frame and surrounding area are included in the assessment.

Hardware and Lock Costs

Hardware can be another part of your overall door replacement budget.

Depending on the door, you may need or want to replace components such as:

  • Hinges
  • Lockset
  • Deadbolt
  • Door handle
  • Strike plates
  • Other related hardware

The hardware you choose can vary in design, finish, features, and price.

Think About Function as Well as Appearance

Your door hardware should be compatible with the door and suitable for its intended use. For a main entry door, homeowners may also want to consider the type of locking system and the appearance of the hardware.

If you are replacing an existing door, ask whether the current hardware can be reused or whether new hardware is recommended.

Including hardware decisions early can make it easier to understand the complete project scope.

Glass, Sidelights and Other Features

A basic solid door and a decorative entry system with glass can involve very different materials and installation requirements.

Sidelights are narrow glass sections installed beside a door. They can allow additional natural light into an entryway and create a more substantial appearance.

Some doors may also include decorative glass panels or other design features.

What Does This Mean for Cost?

Additional features generally add materials and may require more detailed installation. The size and configuration of the door opening can also affect the work involved.

If you are considering a front-door upgrade, decide whether you want a simple replacement or a more substantial entryway transformation.

Your contractor can explain how different configurations may affect the project.

Labor and Installation Complexity

Installation labor is an important part of any door replacement project.

The amount of labor required can depend on the door type, condition of the existing opening, accessibility, frame requirements, and finishing work.

A straightforward replacement may involve fewer steps than a project requiring frame repairs, structural adjustments, new trim, or modifications to the opening.

Why Installation Quality Matters

An exterior door needs to open and close correctly while fitting properly within its frame. It should also be appropriately sealed around the opening.

Poor installation can contribute to issues such as drafts, difficult operation, uneven gaps, or problems with the door’s hardware.

For this reason, homeowners should evaluate a contractor based on experience and workmanship rather than choosing an installer solely because the initial quote is the lowest.

Old Door Removal and Disposal

The cost of replacing a door can also include removing the existing unit.

Old door removal may require additional labor depending on how the existing door and frame were installed and whether the surrounding materials need attention.

The contractor may also need to dispose of the old door and other removed materials.

When comparing estimates, ask whether removal and disposal are included. Otherwise, a quote that initially appears less expensive may not represent the complete scope of work.

What Can Increase Front Door Replacement Cost?

A front door replacement can become more involved when the project includes additional features or changes to the existing entryway.

Factors that may increase the overall scope include:

  • A larger or non-standard door opening
  • Replacement of the existing frame
  • Damaged or deteriorated surrounding materials
  • Decorative glass
  • Sidelights
  • Additional trim
  • New hardware
  • Modifications to the opening
  • Complex installation conditions
  • Additional exterior or interior finishing

This does not mean every front-door replacement will require all of these items. The purpose is to show why project costs can vary significantly from one home to another.

A professional assessment is the best way to identify which factors actually apply to your property.

Why a Professional Estimate Matters

If you search online for “average door replacement cost,” you will find many different numbers. These figures can be useful for general research, but they cannot account for the condition and requirements of your specific home.

A professional estimate provides an opportunity to evaluate the actual door opening, existing frame, materials, hardware requirements, and installation conditions.

It also gives you an opportunity to explain your goals.

Are you primarily concerned about drafts? Do you want a new front entry appearance? Is the existing door difficult to operate? Are you concerned about moisture damage or worn hardware?

The answers can influence which replacement option makes sense.

When requesting an estimate, ask for a clear breakdown of what is included. This may include the door, frame, hardware, removal, installation labor, finishing, and disposal.

Request a Door Replacement Estimate in Florence

So, how much does a door replacement cost? There is no universal answer because every home and project is different. Door type, material, frame condition, hardware, glass, sidelights, installation labor, removal, and other factors can all affect the final project scope.

If your exterior door is damaged, drafty, difficult to operate, outdated, or showing signs of moisture damage, a replacement may be worth considering.

Pee Dee Window and Door Solutions has served local homeowners since 1993, bringing more than 30 years of hands-on experience to home improvement projects. The company specializes in doors, vinyl windows, and vinyl siding, with a focus on quality craftsmanship and personal service.

For homeowners in Florence, SC, a project-specific estimate is the best way to understand what your door replacement may involve.

Thinking about replacing an exterior door? Request an estimate from Pee Dee Window and Door Solutions.
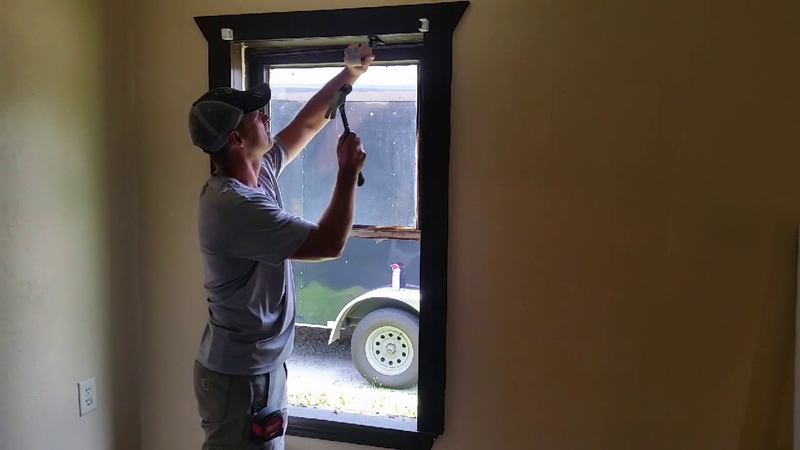
How to Install a Replacement Vinyl Window

How to Prepare for Vinyl Siding Installation

Replacing an old window can improve the appearance, comfort, and functionality of your home. But how to install a replacement vinyl window correctly involves more than placing a new unit into an existing opening. Accurate measurements, proper leveling, secure fastening, insulation, and careful sealing all contribute to a successful installation.

For homeowners, understanding the process can make it easier to prepare for a window replacement project and know what professional installation involves. It can also help you understand why a replacement window needs to fit properly and operate correctly after installation.

This guide provides a homeowner-friendly overview of the main steps involved in installing a vinyl replacement window. It is not intended to replace manufacturer instructions or professional training. Instead, it explains what happens during a typical replacement and why details such as fit, shims, flashing, insulation, and sealant matter.

What Is a Vinyl Replacement Window?

A vinyl replacement window is designed to replace an existing window while using the home’s existing opening. The new unit typically includes a vinyl replacement window frame, glass, sash, and operating components.

Vinyl is commonly used for residential windows because it offers a practical, low-maintenance frame option. Replacement windows may also be available with features such as Low-E glass, insulated glass, and other energy-efficiency options.

When choosing a replacement window, homeowners may encounter ratings and certifications associated with energy performance. NFRC labels, for example, provide standardized information about window performance, while ENERGY STAR identifies products that meet applicable energy-efficiency criteria.

However, even a high-quality window needs proper installation. A well-performing product can lose some of its intended benefits if it is poorly fitted, improperly sealed, or difficult to operate.

Before You Start: Check the Existing Opening

Before removing the old window, the existing opening should be assessed. The condition of the frame, sill, surrounding materials, and opening itself can affect the replacement process.

A replacement window needs to fit the existing space appropriately. If there is damage, moisture deterioration, or another problem around the opening, that issue may need to be addressed before the new window is installed.

Homeowners should also determine whether the existing window is suitable for a replacement installation or whether a different type of window project would be more appropriate.

Why the Opening Matters

The window opening provides the foundation for the new unit. If the opening is uneven, damaged, or incorrectly measured, the replacement window may not sit correctly.

This is one reason professional assessment is useful. An experienced installer can identify potential problems before the old window is removed and help determine the appropriate replacement approach.

Measure the Window Opening

Accurate measurements are among the most important parts of replacement window installation.

The width and height of the existing rough opening or replacement opening need to be measured carefully. Measurements should be taken at multiple points because older openings are not always perfectly square.

Why Multiple Measurements Matter

If an opening is slightly different from top to bottom or side to side, relying on a single measurement can result in a poor fit.

The replacement unit needs enough space for positioning, leveling, and appropriate adjustment. At the same time, excessive gaps can create additional installation and sealing challenges.

Measurements should therefore be taken carefully before ordering the replacement window.

For homeowners, this is an area where professional assistance can reduce the risk of ordering an incorrectly sized unit.

Remove the Existing Window Carefully

Once the replacement unit and project plan are ready, the existing window can be removed.

The removal process depends on the type and construction of the existing window. Components such as the sash may need to be removed before the remaining frame or other components can be addressed.

Care should be taken to avoid unnecessary damage to the surrounding wall or opening.

What Happens After Removal?

Once the old window is out, the installer can inspect the opening more closely. Conditions that were hidden behind the existing unit may become visible.

This can include damaged wood, moisture concerns, deteriorated materials, or other issues that were not apparent during the initial assessment.

If a problem is discovered, it should be addressed before the replacement window is permanently installed.

Inspect the Sill and Frame

The sill and surrounding frame are particularly important because the replacement window needs to sit securely and evenly within the opening.

The installer should check for signs of deterioration, moisture damage, or structural concerns. Any necessary repairs should be completed before moving forward.

A clean and suitable opening provides a better foundation for the replacement window.

This step also helps prevent homeowners from simply covering an existing problem with a new window. If moisture damage exists around the opening, installing a new unit without addressing the source can create future problems.

Position and Level the Replacement Window

The replacement window is then positioned within the prepared opening.

The installer needs to ensure the unit is properly aligned and level. A window that is not positioned correctly can create problems with operation, appearance, and sealing.

Why Leveling Matters

The sash should move as intended after installation. If the frame is twisted or incorrectly positioned, the window may become difficult to open, close, or lock.

The installer will typically check the window from multiple directions to ensure it is properly positioned before permanently securing it.

This is one of the most important stages of the process because later adjustments may be more difficult once the window is fully fastened and finished.

Fasten and Shim the Window Correctly

Shims may be used to help position the replacement window and maintain the appropriate alignment within the opening.

Once the unit is properly positioned, it can be secured using the appropriate fasteners according to the window manufacturer’s requirements.

The goal is to hold the window securely without distorting the frame.

Avoid Over-Tightening

Fasteners need to provide secure attachment, but excessive pressure can affect the shape of the frame. This may interfere with how the sash operates.

The correct fastening method depends on the window product and installation requirements. Professional installers follow the manufacturer’s specifications rather than using the same fastening approach for every window.

Insulate and Seal Around the Window

Once the window has been secured, the gaps around the unit may need appropriate insulation and sealing.

Insulation can help address the space between the replacement unit and the surrounding opening. The appropriate material and application method depend on the window and installation conditions.

A compatible sealant or caulk may then be used around applicable exterior and interior areas to help create a finished, weather-resistant transition.

Why Sealing Matters

A replacement window needs more than a good frame and glass. Gaps around the installation can affect comfort and may allow unwanted air or moisture movement.

Proper sealing helps the window work as part of the home’s overall exterior system.

Flashing may also be relevant depending on the window type, opening, and installation method. The exact requirements should follow the manufacturer’s instructions and applicable building practices.

Check Window Operation

Before the installation is considered complete, the window should be tested.

Open and close the sash several times. Check that it moves smoothly, locks correctly, and sits properly within the frame.

What Should You Check?

Look for:

  • Smooth opening and closing
  • Proper locking
  • Even sash movement
  • Appropriate frame alignment
  • No obvious gaps around the unit
  • Secure operation of any included hardware

If the window does not operate correctly immediately after installation, the issue should be investigated rather than ignored.

A replacement window should not simply look good from the outside. It should also function properly.

Finish Interior and Exterior Trim

The final stage involves completing the areas around the window.

Depending on the project, this may include interior trim, exterior trim, caulk, flashing details, or other finishing components.

The finished transition should look clean and consistent with the rest of the home.

Trim also helps cover installation gaps and create a finished appearance around the opening.

Homeowners should discuss any desired trim changes before the project begins, particularly if the replacement window is part of a larger renovation.

Common Replacement Window Installation Mistakes

Several installation mistakes can affect a replacement window’s performance.

Incorrect Measurements

A poorly measured opening can result in a window that does not fit properly. Taking multiple measurements helps identify variations in the opening.

Skipping Opening Inspection

Installing a new window over damaged or deteriorated materials can leave an underlying problem unresolved.

Poor Leveling

An incorrectly positioned window may be difficult to operate and can create visible alignment issues.

Improper Fastening

Over-tightening or incorrectly positioning fasteners can distort the frame.

Inadequate Sealing

Gaps around the window can affect weather protection and comfort. Appropriate sealing should follow the manufacturer’s requirements.

Failing to Test Operation

A window should be opened, closed, and locked before the installation is considered complete.

These details may seem minor, but they can make a significant difference to the finished result.

DIY vs Professional Window Installation

Some homeowners may consider installing a replacement window themselves. A straightforward project may appear manageable, especially after seeing the basic installation steps.

However, replacement window installation requires accurate measurement, careful handling, proper leveling, appropriate fastening, and attention to weather protection.

Problems can also become more complicated if the existing opening has damage or is not square.

When Professional Installation Makes Sense

Professional installation may be especially helpful when:

  • Multiple windows are being replaced
  • Existing frames show signs of deterioration
  • The openings are uneven
  • The project involves difficult-to-access windows
  • Exterior trim needs modification
  • You are unsure about sealing or flashing
  • You want the installation handled from start to finish

A professional installer can also help homeowners select suitable replacement windows and explain options such as Low-E glass and other performance features.

Professional Vinyl Window Replacement in Florence, SC

Understanding how to install a replacement vinyl window helps homeowners see why proper preparation and installation matter. The process involves much more than placing a new window into an opening.

Accurate measurements, careful removal, inspection, leveling, shimming, fastening, insulation, sealing, and operation checks all contribute to a successful replacement.

For homeowners in Florence, SC, Pee Dee Window and Door Solutions provides vinyl window replacement services backed by more than 30 years of local experience. Since 1993, the company has focused on quality home improvements, personal service, and dependable craftsmanship.

If your existing windows are difficult to operate, damaged, drafty, outdated, or showing signs of failed seals, professional replacement may be worth considering.

Need professional vinyl window replacement in Florence? Request an estimate from Pee Dee Window and Door Solutions.
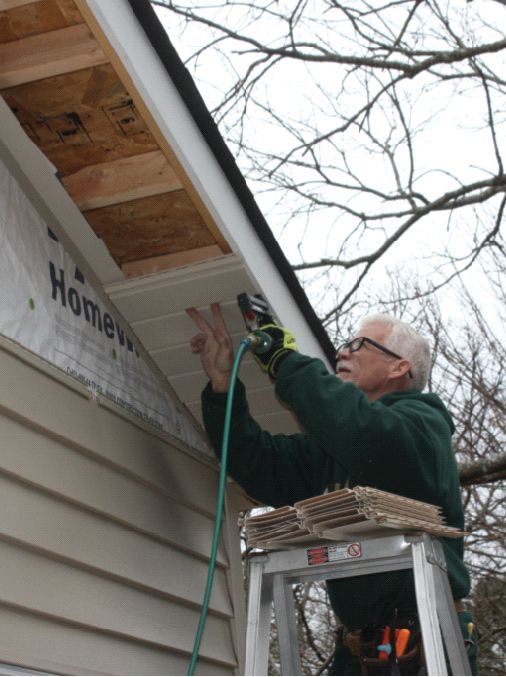
How to Install Vinyl Siding

How to Install Vinyl Siding

Vinyl siding can give a home a clean, updated exterior while providing a practical alternative to more maintenance-intensive siding materials. But how to install vinyl siding correctly involves more than attaching panels to an exterior wall. Proper preparation, accessories, measurements, fastening, and finishing all affect the final result.

For homeowners, understanding the installation process can help you know what to expect when hiring a professional. It can also help you recognize why preparation and careful installation matter.

This guide explains the main stages of vinyl siding installation in straightforward terms. It is not intended to replace professional installation instructions or manufacturer requirements. Instead, it provides a homeowner-friendly overview of how a typical project comes together and why experienced installation can make a difference.

How Vinyl Siding Installation Works

A vinyl siding project generally involves preparing the exterior, installing the components that support the siding system, fitting panels around windows and doors, and finishing the edges and trim.

The process can vary depending on the home’s construction, existing siding, product selected, and manufacturer requirements. However, the basic stages often include:

  1. Inspecting and preparing the exterior
  2. Installing the appropriate weather protection and accessories
  3. Installing the starter components
  4. Planning around windows and doors
  5. Installing the siding panels
  6. Allowing for expansion and movement
  7. Completing trim and finishing details

The goal is not simply to cover the exterior wall. The siding system needs to be installed so that the panels can function properly while creating a consistent finished appearance.

Professional installers also need to account for architectural features, corners, openings, and transitions throughout the home.

Inspect and Prepare the Exterior

Good installation starts with the surface underneath the siding. Before new vinyl siding is installed, the exterior should be assessed to identify conditions that could affect the project.

If existing siding is being replaced, the condition of the wall beneath it may not be fully visible until the old material is removed. Damaged or unsuitable areas may need attention before the new siding can be installed.

What Should Be Checked?

The preparation stage may involve considering:

  • The condition of the exterior wall
  • Existing siding and whether it needs removal
  • Areas around windows and doors
  • Corners and transitions
  • Moisture-related concerns
  • The condition of existing trim
  • The appropriate weather-resistant barrier

A weather-resistant barrier can form an important part of the exterior wall system. The exact materials and installation requirements depend on the home’s construction and the siding manufacturer’s instructions.

This stage is one reason homeowners should avoid viewing siding installation as a simple weekend project. Problems underneath the old siding need to be identified before they are covered by the new material.

Install Required Accessories and Starter Components

Once the exterior is appropriately prepared, the installation can move to the components that help establish the siding system.

A starter strip is installed near the bottom of the siding area. It provides the starting point for the first course of siding panels and helps establish the correct position for the panels above it.

Other accessories can include corner posts and channels used around openings and edges.

Why Starter Components Matter

The first row of siding influences the alignment of the rows above it. If the starting point is not established correctly, small errors can become more noticeable as the installation progresses.

The starter strip therefore needs to be positioned carefully and according to the product requirements.

Corner posts are also important because they provide a finished transition where two exterior walls meet. These components need to be aligned with the rest of the installation.

A professional installer will use the manufacturer’s installation requirements rather than relying on a generic method for every product.

Plan Around Windows and Doors

Windows and doors create some of the most detailed areas of a siding project. The siding needs to transition neatly around these openings while allowing the existing features to function properly.

J-channel is commonly used around certain siding edges and openings. Trim components can also be used to create clean transitions around windows, doors, and other areas.

Why These Areas Require Attention

A window opening may involve several layers and materials. The siding needs to work with the existing window, surrounding trim, and weather protection.

The same applies to exterior doors. Poor planning around an opening can result in uneven cuts, unattractive transitions, or problems with the finished installation.

This is also why homeowners considering window or door replacement should discuss those projects with their siding contractor before installation begins.

If a window or door is going to be replaced soon, coordinating the work can sometimes make more sense than completing the siding first and modifying it later.

Install Vinyl Siding Panels

After the supporting components are in place, the siding panels can be installed.

Panels are generally installed in courses, with each row connecting to the one below it. The installer works across the exterior while checking alignment and fitting the panels around corners and openings.

The process may look straightforward, but careful measurement and positioning are important. Each panel needs to be appropriately fitted without creating unnecessary stress on the material.

Why Alignment Matters

A siding installation can cover a large portion of the home’s exterior. Even small alignment problems may become obvious when viewed across an entire wall.

Installers therefore need to monitor the position of the panels as the work progresses. Corners, windows, doors, rooflines, and other architectural features can make this more challenging.

The installation should also follow the specific requirements of the siding product being used.

Allow for Material Movement

One of the most important concepts in vinyl siding installation is that the material needs room to move.

Vinyl can expand and contract as temperatures change. If panels are installed too tightly or fasteners are used incorrectly, the siding may not have enough freedom to move naturally.

Why Expansion Matters

Proper installation allows for expansion and contraction without placing unnecessary stress on the panels.

Fasteners should secure the siding while still allowing the panels to move as intended. The exact requirements depend on the siding product and manufacturer’s instructions.

This is one area where professional installation can be particularly valuable. A visually neat installation is not enough if the panels have been fastened in a way that prevents normal movement.

Homeowners should not assume that tighter always means better. With vinyl siding, appropriate movement is part of the installation system.

Finish Around Trim and Openings

Once the main siding panels are installed, attention turns to the edges and transitions.

This can include areas around:

  • Windows
  • Exterior doors
  • Corners
  • Soffits
  • Fascia
  • Rooflines
  • Other exterior openings

Trim helps create a finished appearance and provides transitions between the siding and other parts of the home’s exterior.

The exact components used depend on the home’s design and the siding system.

Finishing Requires Precision

The final details can have a major impact on the overall appearance of the project. Uneven cuts, poorly aligned trim, or inconsistent transitions can stand out even when most of the siding installation looks good.

Professional installers also need to work around existing architectural features without compromising the siding system.

This is why the finishing stage should not be treated as an afterthought.

Common Vinyl Siding Installation Mistakes

Understanding common mistakes can help homeowners recognize why professional installation matters.

Installing Over an Unprepared Surface

Covering damaged or unsuitable exterior surfaces without addressing them first can create problems later. Preparation should be completed before new siding conceals the underlying area.

Incorrect Fastening

Overdriving fasteners or securing panels too tightly can restrict the movement vinyl siding needs.

Ignoring Expansion

Vinyl siding needs room to expand and contract. Failing to account for material movement can affect the appearance and performance of the installation.

Poor Alignment

If the first course is not positioned correctly, alignment problems can continue across the exterior.

Improper Cutting Around Openings

Windows and doors require careful measurements and finishing. Poor cuts can make the completed project look uneven.

Skipping Manufacturer Requirements

Different siding products may have specific installation requirements. A generic approach may not be appropriate for every product.

For these reasons, homeowners should follow the manufacturer’s instructions or have the installation completed by a qualified professional.

DIY vs Professional Vinyl Siding Installation

Some homeowners may consider installing siding themselves to reduce project costs. While basic installation concepts may seem manageable, a complete siding project involves more decisions than simply attaching panels.

DIY installation requires the homeowner to understand surface preparation, weather protection, measurements, starter components, trim, fastening, expansion, and detailed work around openings.

There is also the question of time. Installing siding on an entire home can involve significant preparation and repeated work across large exterior surfaces.

When DIY May Become Difficult

A project becomes more challenging when the home has:

  • Multiple levels
  • Complex architectural features
  • Numerous windows and doors
  • Damaged underlying surfaces
  • Existing siding that requires removal
  • Difficult exterior access
  • Extensive trim requirements

Mistakes may also be expensive to correct after materials have been installed.

For homeowners without experience, professional installation can provide a more straightforward path to a finished result.

When to Call a Professional

If you are unsure about the condition of your exterior wall, have extensive siding damage, or simply do not want to manage a large installation yourself, consider contacting a professional siding contractor.

A professional can evaluate the project, identify preparation requirements, discuss suitable siding options, and explain what the installation involves.

An experienced installer can also handle the detailed areas around windows, doors, corners, trim, soffits, and fascia.

Most importantly, professional installation can help reduce the risk of mistakes involving alignment, fastening, expansion, and weather protection.

Before hiring a contractor, ask about their experience, the scope of work, materials, preparation, and what is included in the estimate.

Vinyl Siding Installation in Florence, SC

Knowing how to install vinyl siding gives homeowners a better understanding of what happens during an exterior renovation. The process starts with preparation and continues through accessories, starter components, siding panels, expansion considerations, and detailed finishing.

However, understanding the process is different from carrying out a complete installation. Siding needs to work as part of the home’s exterior system, and small mistakes can affect the finished appearance or performance.

Pee Dee Window and Door Solutions has served local homeowners since 1993 and brings more than 30 years of hands-on experience to home improvement projects. We specialize in vinyl siding, vinyl window replacement, and door installation.

If you are considering new siding for your home in Florence, SC, you do not have to manage the installation yourself.

Want the siding installed professionally? Request an estimate from Pee Dee Window and Door Solutions.
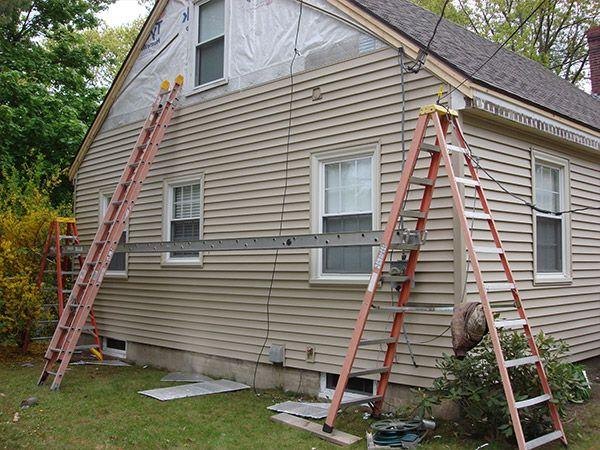
How to Prepare for Vinyl Siding Installation

How to Prepare for Vinyl Siding Installation

Replacing your home’s siding is an exciting way to refresh its exterior, but good preparation can make the project easier for everyone involved. Knowing how to prepare for vinyl siding installation can help you protect your belongings, give the installation crew clear access, and reduce unnecessary disruptions.

As a homeowner, you do not need to handle the installation yourself. Your siding contractor will take care of the technical work. Your role is to prepare the property and make sure the team can work safely and efficiently.

From moving outdoor furniture to protecting landscaping and planning for children and pets, several simple steps can help you get ready. This guide explains what to do before the crew arrives, what questions to ask your contractor, and what you can expect during the installation process.

What Happens Before Vinyl Siding Installation?

Before installation begins, your contractor should review the project and confirm important details such as the exterior areas being replaced, materials, installation schedule, and any preparation or removal work.

This is a good time for homeowners to ask questions. Make sure you understand what areas of the home are included and whether the contractor will remove and dispose of the existing siding.

You should also discuss any exterior features that could affect the work. These may include outdoor lighting, security cameras, satellite equipment, hose reels, decorations, or other fixtures attached to the siding.

A clear understanding of the project before work starts can prevent confusion later.

Clear the Area Around Your Home

One of the simplest ways to prepare is to clear the work area around the house. Vinyl siding installation requires the crew to work close to the exterior walls, so removing unnecessary obstacles can make access easier.

Move outdoor furniture, children’s toys, gardening tools, decorations, and other portable items away from the walls.

You do not necessarily need to move everything across the property. The goal is to create enough space for the installation crew to work safely around the home’s exterior.

Check Around Windows and Doors

Pay particular attention to areas around windows and doors. These locations often require additional finishing and trim work, so keeping them accessible is important.

If you have furniture or decorations directly outside these areas, move them before the installation crew arrives.

Protect Landscaping and Outdoor Items

Your landscaping is an important part of your property, so discuss protection measures with your siding contractor before work begins.

Installation may involve ladders, tools, materials, and movement around the exterior. Plants, shrubs, flower beds, and other landscaping features near the walls may need attention during the project.

What Can Homeowners Do?

You can help by:

  • Moving portable planters and decorations.
  • Clearing garden tools from work areas.
  • Identifying delicate plants near the walls.
  • Discussing landscaping concerns with the contractor.
  • Keeping pathways clear.

Do not assume that every landscaping issue will be obvious to the installation team. If there is a particular plant or feature you want protected, point it out before work starts.

A short conversation before installation can help everyone understand what matters to you.

Prepare Interior Walls and Shelves

Vinyl siding is installed on the outside of your home, so homeowners sometimes wonder whether they need to prepare the interior.

In many cases, extensive interior preparation is unnecessary. However, siding replacement can involve normal construction activity, including movement, drilling, and other work around exterior walls.

If you have delicate items hanging on walls near the exterior, consider moving them temporarily. You may also want to secure fragile decorations or objects on nearby shelves.

This is particularly worth considering if the home has older construction or if the project involves significant preparation behind the existing siding.

Ask your contractor whether there are any specific areas of your home’s interior that need attention before the project begins.

Make Sure Contractors Have Access

Clear access is essential for a smooth vinyl siding installation. Your contractor may need to move materials and equipment around the property throughout the project.

Make sure gates can be opened and pathways are accessible. If there are locked gates or other access restrictions, provide the necessary arrangements before the scheduled start date.

Think About Parking and Deliveries

Your contractor may need space for vehicles, tools, and materials. Ask where materials will be delivered and whether any temporary parking arrangements are necessary.

If you live in a neighborhood with specific parking restrictions, communicate these details in advance.

Good access planning can reduce delays and make it easier for the crew to move safely around your property.

Plan for Children and Pets

A siding project can create a busy environment around your home. There may be tools, ladders, materials, vehicles, and areas that are temporarily unsuitable for children or pets.

For safety, keep children away from active work areas. Pets should also be kept indoors or in another secure area away from the installation zone.

Create a Safe Routine

If your dog normally spends time in the backyard, consider where it will stay while the crew is working.

The same applies to children who normally play outside. Establishing these arrangements before installation starts can help prevent accidents and reduce stress during the project.

Your siding contractor can explain which areas will be active during installation so you can plan accordingly.

Ask About Old Siding Removal

If your home already has siding, ask your contractor whether the existing material will be removed before the new siding is installed.

Removal can affect the project’s schedule, preparation requirements, and overall scope. It can also reveal conditions beneath the old siding that were not visible beforehand.

Questions to Ask

Before work begins, ask:

  • Will the existing siding be removed?
  • Is removal included in the estimate?
  • How will old materials be disposed of?
  • Will the exterior wall be inspected afterward?
  • What happens if repairs are needed?

Understanding these details before installation begins can help you avoid surprises.

Discuss Utilities and Exterior Fixtures

Homes often have fixtures attached to their exterior walls. These may include exterior lights, electrical equipment, cameras, satellite dishes, address signs, hose fixtures, or other items.

Some may need to be temporarily removed or adjusted before the new siding is installed.

Make a list of fixtures you know are attached to the siding and discuss them with your siding contractor.

Do not remove electrical or other potentially hazardous fixtures yourself unless they are designed for safe homeowner removal. Your contractor can tell you what needs to be handled by an appropriate professional.

This is also a good time to mention any future exterior upgrades you are considering. If you plan to replace windows or doors, coordinating the projects may be worth discussing.

Questions to Ask Your Installer Before Work Begins

A good conversation with your contractor can make the installation process much easier.

Consider asking:

When will the project start?

Confirm the expected installation schedule and whether weather or other conditions could affect the timing.

How long should the work take?

The timeframe can vary based on home size, existing siding, preparation, design, and other factors.

What preparation is included?

Ask whether the contractor handles existing siding removal, surface preparation, and disposal.

What should I move?

Find out whether outdoor furniture, decorations, planters, or other items need to be moved before the crew arrives.

How will the property be protected?

Discuss how landscaping and other exterior areas will be handled during installation.

What happens if damage is discovered?

Ask what happens if the contractor finds an issue behind the existing siding that requires additional work.

Getting answers before work begins helps establish realistic expectations.

What to Expect During Installation

Once preparation is complete, the installation crew can begin the project according to the agreed plan.

The process may include removing existing materials, preparing the exterior, installing appropriate supporting components, and attaching the new vinyl siding. Trim and finishing details are also addressed around areas such as windows, doors, corners, soffits, and fascia.

You can expect some normal construction activity during the project. There may be noise, movement around the property, material deliveries, and temporary changes to access.

The amount of disruption depends on the size and complexity of the home.

Stay Available for Questions

Although you do not need to supervise every part of the installation, remaining available for important questions can be helpful.

If the crew discovers an unexpected condition or needs clarification about a particular feature, having a homeowner or designated contact available can help keep the project moving.

Need Vinyl Siding Installation in Florence?

Knowing how to prepare for vinyl siding installation can help you approach your home improvement project with greater confidence. Clearing work areas, protecting landscaping, planning for children and pets, arranging access, and discussing existing siding and exterior fixtures are all useful steps.

The technical installation should be handled by an experienced professional. Your job as a homeowner is mainly to prepare the property, communicate your expectations, and understand what will happen during the project.

Pee Dee Window and Door Solutions has served local homeowners since 1993, providing vinyl siding, vinyl window replacement, and door installation services. With more than 30 years of experience, we focus on quality craftsmanship and personal service.

If you’re planning a siding project in Florence, SC, request a vinyl siding estimate to discuss your home and project requirements.

How Much Does Vinyl Siding Installation Cost?

How Much Does Vinyl Siding Installation Cost?

Homeowners often ask, how much does vinyl siding installation cost before they begin planning an exterior renovation. The honest answer is that there is no single price that applies to every home. The final cost depends on the size of the property, siding selected, existing exterior, preparation requirements, labor, and several other project details.

If you are planning a siding project in Florence, SC, understanding these factors can help you create a realistic budget before requesting estimates. It can also make it easier to compare quotes and understand why prices may differ between homes.

Pee Dee Window and Door Solutions provides vinyl siding installation for local homeowners and recommends getting a project-specific estimate rather than relying on a generic price. In this guide, we explain the main factors that influence vinyl siding installation cost and what to consider when planning your budget.

What Determines Vinyl Siding Installation Cost?

The total installation cost of vinyl siding is based on the scope of the project rather than simply the price of the siding itself. Two homes with similar floor plans can have very different siding costs if their exterior designs, existing materials, or preparation requirements differ.

Some of the most important factors include:

  • The home’s exterior size
  • Amount of siding required
  • Vinyl siding style and material
  • Removal of existing siding
  • Condition of the exterior wall
  • Repairs and preparation
  • Labor and installation complexity
  • Trim and finishing requirements
  • Soffit and fascia work
  • Insulation or other upgrades

Understanding each of these factors can help you make better decisions when planning your project.

House Size and Amount of Siding Needed

One of the biggest factors affecting siding cost is the amount of exterior wall area that needs to be covered. Contractors generally need to determine the square footage of the siding area rather than simply looking at the home’s interior living space.

A larger home will typically require more siding panels, trim, accessories, and installation time. However, the calculation is not always as simple as multiplying a home’s floor area by a standard figure.

The shape and design of the exterior can also affect the amount of material required. Homes with multiple levels, extensions, gables, dormers, or other architectural features may require additional measurements and more detailed installation.

Windows and doors can reduce the amount of siding needed in certain areas, but the surrounding trim and finishing work still need to be considered.

For this reason, an accurate measurement of the home’s exterior is an important part of developing a project estimate.

Siding Material and Style

Not all vinyl siding products are the same. Homeowners can choose from different styles, profiles, textures, and appearances, and the product selected can affect the overall project budget.

Some homeowners want a traditional siding appearance, while others may prefer a style that creates a more distinctive exterior. The right choice depends on the architecture of the home and the appearance you want to achieve.

When comparing materials, consider more than the initial price. Think about the appearance, maintenance requirements, durability, and how the siding will work with other exterior features such as windows, doors, trim, and roofing.

Your siding contractor can help explain the available options and how the selected product may affect the overall project.

Removal of Existing Siding

If your home already has siding, the existing material may need to be removed before the new siding can be installed. The amount of work involved depends on what is currently on the home and its condition.

Existing siding that is damaged, deteriorated, or difficult to remove may require additional labor. Disposal also needs to be considered as part of the project.

In some situations, the condition of the underlying surface may not become clear until the existing siding is removed. This is one reason homeowners should avoid assuming that every project will involve the same preparation requirements.

Ask your contractor whether removal and disposal of existing materials are included in the estimate. A detailed quote should make it clear what work is covered.

Wall Repairs and Preparation

The condition of the exterior wall can also influence the project budget. Once old siding is removed, the underlying surface may require attention before new vinyl siding can be installed.

Preparation may include addressing damaged areas, replacing unsuitable materials, or making other repairs required for the installation.

This work is difficult to price accurately without looking at the property. A contractor may be able to identify some issues during an initial inspection, but concealed conditions can sometimes become apparent only when existing materials are removed.

That is why a professional assessment is valuable. It allows the contractor to consider the condition of the home’s exterior rather than providing a price based only on general assumptions.

Trim, Soffit and Fascia

Siding does not exist in isolation. The finished project may involve several components around the home’s exterior.

Trim, soffit, and fascia can contribute to both the appearance and finishing of a siding installation. Areas around windows and doors also require appropriate detailing so the new siding transitions neatly around existing features.

A home with many windows, doors, corners, or architectural details may require more finishing work than a simple rectangular exterior.

When reviewing an estimate, check whether these components are included. A lower initial price may not represent the complete cost if certain finishing items are excluded.

Labor and Installation Complexity

Labor is another major component of vinyl siding installation cost. The time required to complete a project can vary based on the size and design of the home, accessibility, preparation requirements, and installation details.

A straightforward exterior may be relatively simple to work on, while a home with multiple levels, complex architectural features, or difficult access can require additional time.

The experience and workmanship of the installation team should also be considered when comparing estimates. Vinyl siding needs to be installed correctly to create a consistent finished appearance and allow the siding system to perform as intended.

Rather than choosing a contractor based solely on the lowest quote, consider the overall scope of work, materials, installation approach, and reputation.

Does Insulated Vinyl Siding Cost More?

Some homeowners consider insulation as part of their siding project. Depending on the product and installation approach, insulated vinyl siding or additional insulation may increase the initial project cost.

However, the decision should be based on your home’s needs and your renovation goals rather than assuming that more insulation is always necessary.

When discussing insulation, ask what product is being proposed, where it will be installed, and how it fits into the overall exterior wall system.

The best choice can depend on factors such as the existing construction, condition of the exterior, climate, and other characteristics of the home.

If insulation is included in your project, make sure the estimate clearly identifies it so you can understand how it contributes to the total budget.

How Can Homeowners Plan a Siding Budget?

Start by defining the scope of your project. Are you replacing siding on the entire home or only specific sections? Are you also planning to update trim, soffit, fascia, windows, or doors?

Next, consider the condition of the existing exterior. If the siding is damaged or the underlying wall may require repairs, allow some flexibility in your budget.

It is also useful to compare estimates based on the same scope of work. When requesting multiple quotes, ask each contractor to identify:

  • Siding material and style
  • Estimated square footage
  • Removal of existing siding
  • Disposal
  • Preparation or repairs
  • Labor
  • Trim and finishing
  • Soffit and fascia work
  • Insulation, if applicable
  • Any other project-specific charges

This makes it easier to compare proposals fairly.

Most importantly, avoid building your entire budget around a generic online cost figure. A real property has its own measurements, materials, condition, and installation requirements.

Why an On-Site Estimate Is More Accurate

An on-site estimate gives a contractor the opportunity to evaluate the actual property rather than relying on assumptions.

During an assessment, the contractor can consider the size of the exterior wall, existing siding, windows and doors, trim, soffit, fascia, access, and other factors that can influence the work.

It also gives you an opportunity to explain what you want from the project. You may have a particular siding appearance in mind or want to coordinate the new siding with replacement windows or an exterior door.

For Florence homeowners, an on-site estimate from a local contractor can provide a much more useful starting point than a national average or online calculator.

Pee Dee Window and Door Solutions has served local homeowners since 1993 and provides vinyl siding, window, and door services. Our approach is based on understanding the specific project and providing personal service.

Get a Vinyl Siding Estimate in Florence, SC

So, how much does vinyl siding installation cost? The answer depends on your home and the scope of the project. House size, siding selection, existing material removal, wall preparation, labor, trim, soffit, fascia, insulation, and installation complexity can all affect the final price.

Rather than relying on a generic figure, Florence homeowners should request an estimate based on their actual property. A project-specific assessment provides a clearer picture of the work involved and allows you to make decisions based on your home’s needs.

Pee Dee Window and Door Solutions has provided home improvement services since 1993, with more than 30 years of experience serving local homeowners. We specialize in vinyl siding, vinyl window replacement, and door installation.

If you’re planning a siding project, request a vinyl siding estimate and discuss your home’s exterior with our team.

You can also explore our Vinyl Siding Installation Florence SC service page for more information about the installation process and available options.

Serving our community since 1993, we provide quality vinyl windows, doors, and siding built to last. Contact us for an estimate.