

How to Prepare for Vinyl Siding Installation
Replacing an old window can improve the appearance, comfort, and functionality of your home. But how to install a replacement vinyl window correctly involves more than placing a new unit into an existing opening. Accurate measurements, proper leveling, secure fastening, insulation, and careful sealing all contribute to a successful installation.
For homeowners, understanding the process can make it easier to prepare for a window replacement project and know what professional installation involves. It can also help you understand why a replacement window needs to fit properly and operate correctly after installation.
This guide provides a homeowner-friendly overview of the main steps involved in installing a vinyl replacement window. It is not intended to replace manufacturer instructions or professional training. Instead, it explains what happens during a typical replacement and why details such as fit, shims, flashing, insulation, and sealant matter.
What Is a Vinyl Replacement Window?
A vinyl replacement window is designed to replace an existing window while using the home’s existing opening. The new unit typically includes a vinyl replacement window frame, glass, sash, and operating components.
Vinyl is commonly used for residential windows because it offers a practical, low-maintenance frame option. Replacement windows may also be available with features such as Low-E glass, insulated glass, and other energy-efficiency options.
When choosing a replacement window, homeowners may encounter ratings and certifications associated with energy performance. NFRC labels, for example, provide standardized information about window performance, while ENERGY STAR identifies products that meet applicable energy-efficiency criteria.
However, even a high-quality window needs proper installation. A well-performing product can lose some of its intended benefits if it is poorly fitted, improperly sealed, or difficult to operate.
Before You Start: Check the Existing Opening
Before removing the old window, the existing opening should be assessed. The condition of the frame, sill, surrounding materials, and opening itself can affect the replacement process.
A replacement window needs to fit the existing space appropriately. If there is damage, moisture deterioration, or another problem around the opening, that issue may need to be addressed before the new window is installed.
Homeowners should also determine whether the existing window is suitable for a replacement installation or whether a different type of window project would be more appropriate.
Why the Opening Matters
The window opening provides the foundation for the new unit. If the opening is uneven, damaged, or incorrectly measured, the replacement window may not sit correctly.
This is one reason professional assessment is useful. An experienced installer can identify potential problems before the old window is removed and help determine the appropriate replacement approach.
Measure the Window Opening
Accurate measurements are among the most important parts of replacement window installation.
The width and height of the existing rough opening or replacement opening need to be measured carefully. Measurements should be taken at multiple points because older openings are not always perfectly square.
Why Multiple Measurements Matter
If an opening is slightly different from top to bottom or side to side, relying on a single measurement can result in a poor fit.
The replacement unit needs enough space for positioning, leveling, and appropriate adjustment. At the same time, excessive gaps can create additional installation and sealing challenges.
Measurements should therefore be taken carefully before ordering the replacement window.
For homeowners, this is an area where professional assistance can reduce the risk of ordering an incorrectly sized unit.
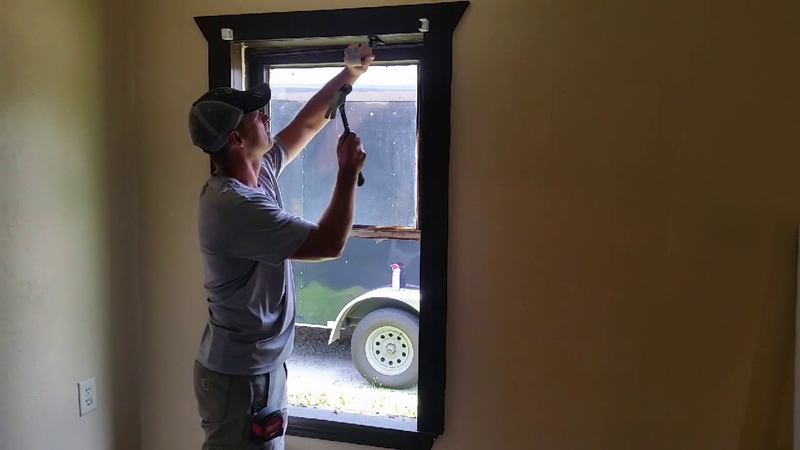
Remove the Existing Window Carefully
Once the replacement unit and project plan are ready, the existing window can be removed.
The removal process depends on the type and construction of the existing window. Components such as the sash may need to be removed before the remaining frame or other components can be addressed.
Care should be taken to avoid unnecessary damage to the surrounding wall or opening.
What Happens After Removal?
Once the old window is out, the installer can inspect the opening more closely. Conditions that were hidden behind the existing unit may become visible.
This can include damaged wood, moisture concerns, deteriorated materials, or other issues that were not apparent during the initial assessment.
If a problem is discovered, it should be addressed before the replacement window is permanently installed.
Inspect the Sill and Frame
The sill and surrounding frame are particularly important because the replacement window needs to sit securely and evenly within the opening.
The installer should check for signs of deterioration, moisture damage, or structural concerns. Any necessary repairs should be completed before moving forward.
A clean and suitable opening provides a better foundation for the replacement window.
This step also helps prevent homeowners from simply covering an existing problem with a new window. If moisture damage exists around the opening, installing a new unit without addressing the source can create future problems.
Position and Level the Replacement Window
The replacement window is then positioned within the prepared opening.
The installer needs to ensure the unit is properly aligned and level. A window that is not positioned correctly can create problems with operation, appearance, and sealing.
Why Leveling Matters
The sash should move as intended after installation. If the frame is twisted or incorrectly positioned, the window may become difficult to open, close, or lock.
The installer will typically check the window from multiple directions to ensure it is properly positioned before permanently securing it.
This is one of the most important stages of the process because later adjustments may be more difficult once the window is fully fastened and finished.
Fasten and Shim the Window Correctly
Shims may be used to help position the replacement window and maintain the appropriate alignment within the opening.
Once the unit is properly positioned, it can be secured using the appropriate fasteners according to the window manufacturer’s requirements.
The goal is to hold the window securely without distorting the frame.
Avoid Over-Tightening
Fasteners need to provide secure attachment, but excessive pressure can affect the shape of the frame. This may interfere with how the sash operates.
The correct fastening method depends on the window product and installation requirements. Professional installers follow the manufacturer’s specifications rather than using the same fastening approach for every window.
Insulate and Seal Around the Window
Once the window has been secured, the gaps around the unit may need appropriate insulation and sealing.
Insulation can help address the space between the replacement unit and the surrounding opening. The appropriate material and application method depend on the window and installation conditions.
A compatible sealant or caulk may then be used around applicable exterior and interior areas to help create a finished, weather-resistant transition.
Why Sealing Matters
A replacement window needs more than a good frame and glass. Gaps around the installation can affect comfort and may allow unwanted air or moisture movement.
Proper sealing helps the window work as part of the home’s overall exterior system.
Flashing may also be relevant depending on the window type, opening, and installation method. The exact requirements should follow the manufacturer’s instructions and applicable building practices.
Check Window Operation
Before the installation is considered complete, the window should be tested.
Open and close the sash several times. Check that it moves smoothly, locks correctly, and sits properly within the frame.
What Should You Check?
Look for:
- Smooth opening and closing
- Proper locking
- Even sash movement
- Appropriate frame alignment
- No obvious gaps around the unit
- Secure operation of any included hardware
If the window does not operate correctly immediately after installation, the issue should be investigated rather than ignored.
A replacement window should not simply look good from the outside. It should also function properly.
Finish Interior and Exterior Trim
The final stage involves completing the areas around the window.
Depending on the project, this may include interior trim, exterior trim, caulk, flashing details, or other finishing components.
The finished transition should look clean and consistent with the rest of the home.
Trim also helps cover installation gaps and create a finished appearance around the opening.
Homeowners should discuss any desired trim changes before the project begins, particularly if the replacement window is part of a larger renovation.
Common Replacement Window Installation Mistakes
Several installation mistakes can affect a replacement window’s performance.
Incorrect Measurements
A poorly measured opening can result in a window that does not fit properly. Taking multiple measurements helps identify variations in the opening.
Skipping Opening Inspection
Installing a new window over damaged or deteriorated materials can leave an underlying problem unresolved.
Poor Leveling
An incorrectly positioned window may be difficult to operate and can create visible alignment issues.
Improper Fastening
Over-tightening or incorrectly positioning fasteners can distort the frame.
Inadequate Sealing
Gaps around the window can affect weather protection and comfort. Appropriate sealing should follow the manufacturer’s requirements.
Failing to Test Operation
A window should be opened, closed, and locked before the installation is considered complete.
These details may seem minor, but they can make a significant difference to the finished result.
DIY vs Professional Window Installation
Some homeowners may consider installing a replacement window themselves. A straightforward project may appear manageable, especially after seeing the basic installation steps.
However, replacement window installation requires accurate measurement, careful handling, proper leveling, appropriate fastening, and attention to weather protection.
Problems can also become more complicated if the existing opening has damage or is not square.
When Professional Installation Makes Sense
Professional installation may be especially helpful when:
- Multiple windows are being replaced
- Existing frames show signs of deterioration
- The openings are uneven
- The project involves difficult-to-access windows
- Exterior trim needs modification
- You are unsure about sealing or flashing
- You want the installation handled from start to finish
A professional installer can also help homeowners select suitable replacement windows and explain options such as Low-E glass and other performance features.
Professional Vinyl Window Replacement in Florence, SC
Understanding how to install a replacement vinyl window helps homeowners see why proper preparation and installation matter. The process involves much more than placing a new window into an opening.
Accurate measurements, careful removal, inspection, leveling, shimming, fastening, insulation, sealing, and operation checks all contribute to a successful replacement.
For homeowners in Florence, SC, Pee Dee Window and Door Solutions provides vinyl window replacement services backed by more than 30 years of local experience. Since 1993, the company has focused on quality home improvements, personal service, and dependable craftsmanship.
If your existing windows are difficult to operate, damaged, drafty, outdated, or showing signs of failed seals, professional replacement may be worth considering.
Need professional vinyl window replacement in Florence? Request an estimate from Pee Dee Window and Door Solutions.